.png?fit=max&auto=format&n=yGy5n0_4pe4tvrEB&q=85&s=cdcea1c5e8c72d300ee0bd67c26aece6)
.png?fit=max&auto=format&n=yGy5n0_4pe4tvrEB&q=85&s=4526a26be075ef0697da5f15c2314ef7)
Importing the file to Roblox Studio
1
Step 1
Download the product file from the discord server. There’s a channel named “Reservation System” under the “Products” folder, where you can download the product file.
2
Step 2
Import the file to Roblox Studio by dragging and dropping the file to your experience
3
Step 3
Ungroup the model “Reservation System | UNGROUP”
Configuring the master settings of the system
Here you can configure the master settings of the system. Go toRN | Reservation System > Configuration to configure the system.
Configurations
CheckInTimeout
CheckInTimeout
Changes the timeout for check-in after the reservation starts in minutes. Example: if set to 10, you have to check-in to the room within 10 minutes of the reservation starting. The reservation is automatically cancelled after this timeout ends. Default parameter: 10
MaxBookingTime
MaxBookingTime
Changes the maximum time of a reservation in minutes. Example: if
MaxBookingTime is set to 60, the maximum time for a booking is 60 minutes. Default parameter: 60MaxTimeBeforeBooking
MaxTimeBeforeBooking
Changes the maximum time in minutes before a reservation can be made. Example: if set to 30, the maximum time you can make a reservation in advance is 30 minutes. Default parameter: 30
Colors
Colors
With this table, you can change different screen and side LED colors for different scenarios. Default parameters:
Available = Color3.fromRGB(80, 160, 100), Busy = Color3.fromRGB(180, 70, 70), CheckIn = Color3.fromRGB(200, 140, 50), Offline = Color3.fromRGB(100, 100, 100)Configuring a Reservation Screen’s settings
Here you can configure each individual Reservation Screen’s settings. Go toRN | Reservation System > Reservation Screen > Configuration
RoomName
RoomName
Changes the name that will be displayed on the screen.
MaxPeople
MaxPeople
Changes the maximum number of people that can fit in the room.
Using the system
Here you can see how you can use the system. ㅤㅤㅤㅤㅤRoom Available
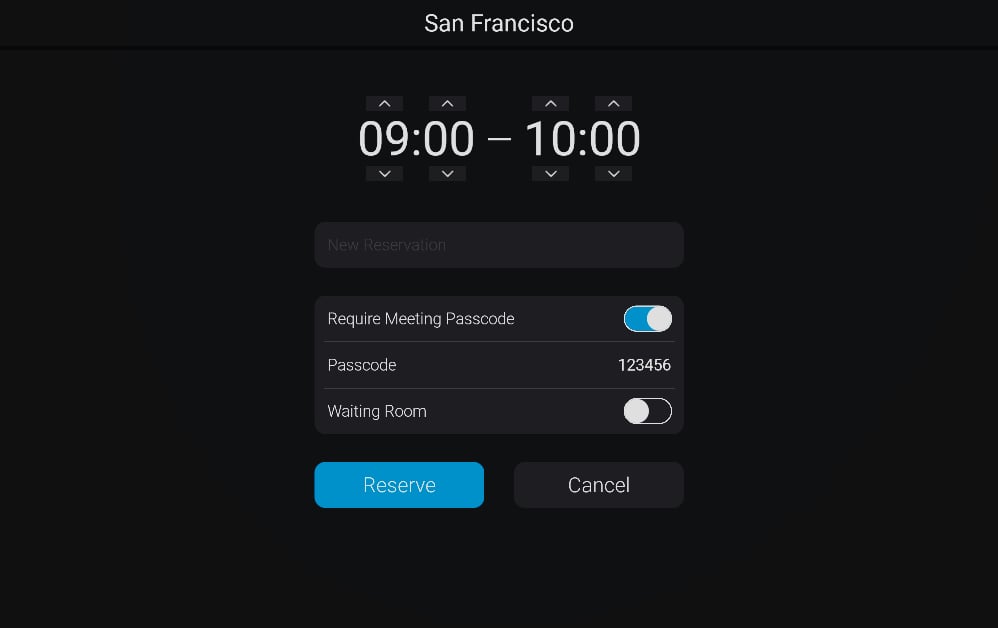
When the room is available, you can see the upcoming reservations and schedule a new reservation. To schedule a new reservation, press “Reserve” to open the reservation menu.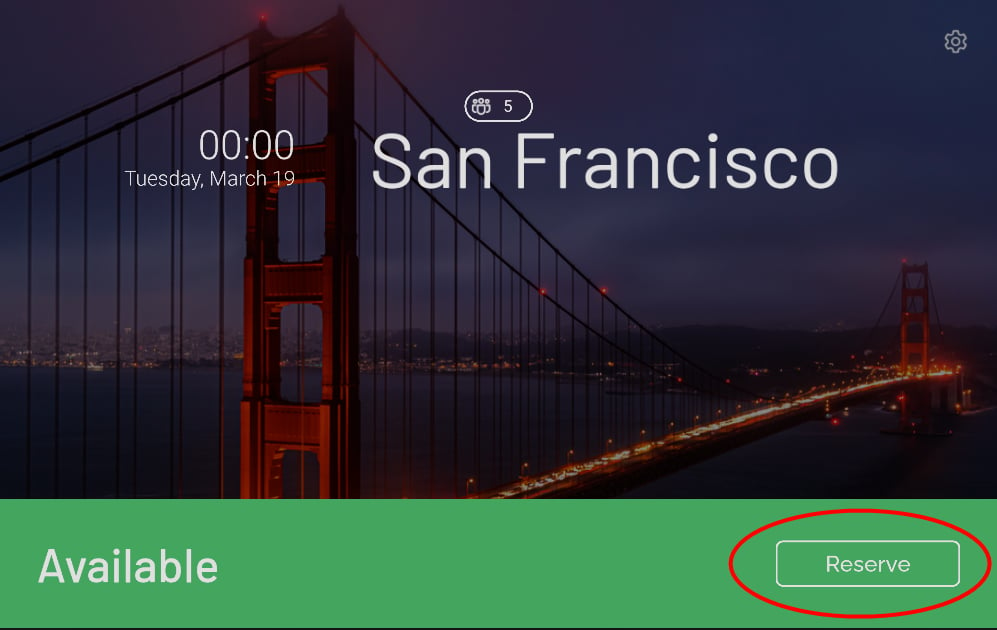
Checking in to a reservation
When it is time for a reservation, the screen’s and side LED’s colors will turn orange or the set color in settings and the button on the screen will change to “Check-in” indicating that you can now check-in to the room. If you do not check-in within the set time in settings, the reservation will be automatically cancelled.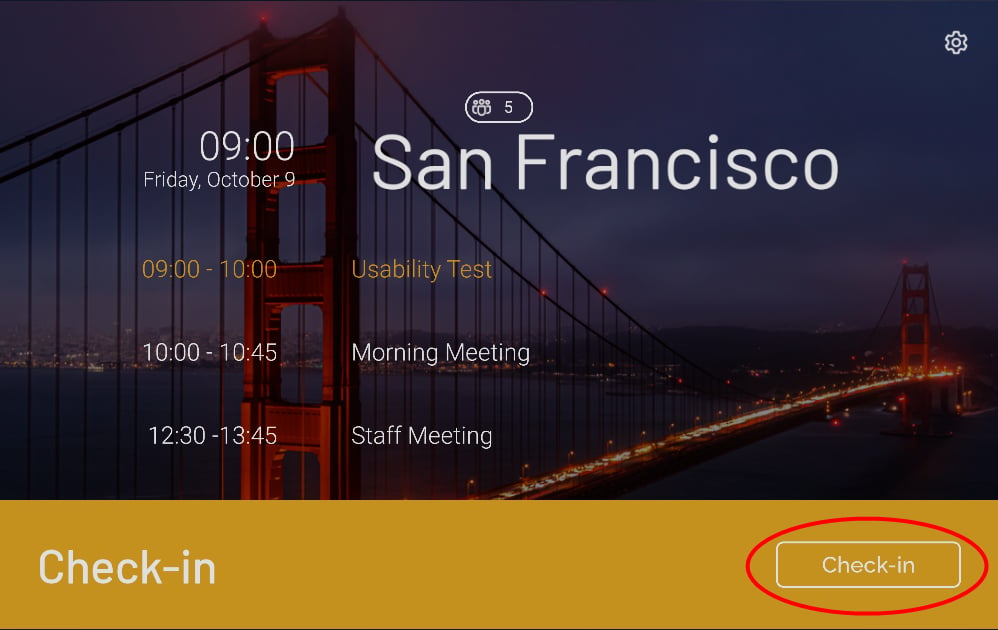
Room Busy
When the room is currently busy, the screen and side LEDs will be red or the set color in settings. When the room is busy, you can release the room early pressing “Release Room” or make a new reservation by pressing “Reserve”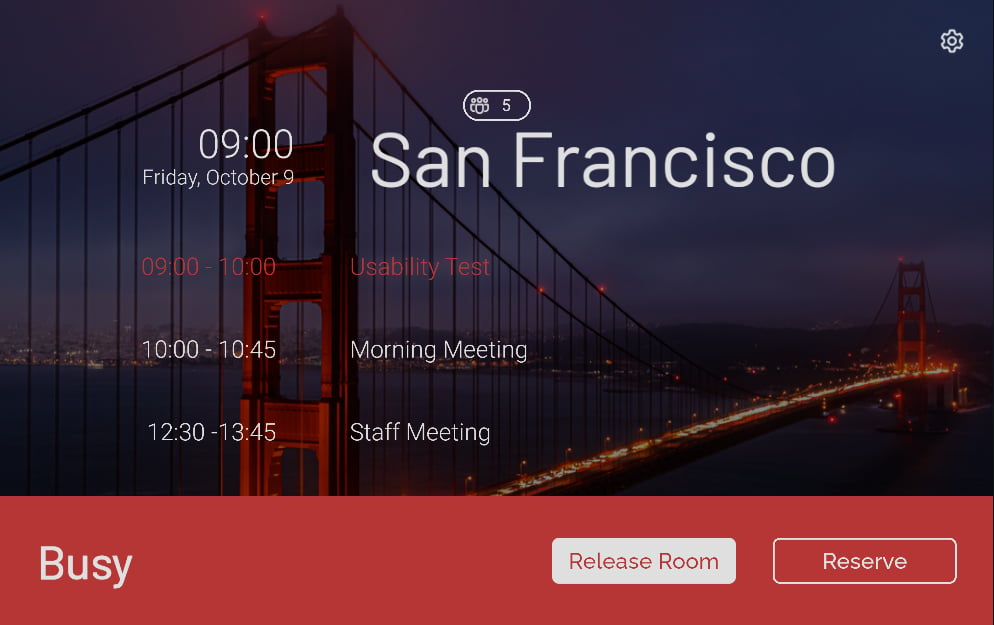
Deleting a reservation
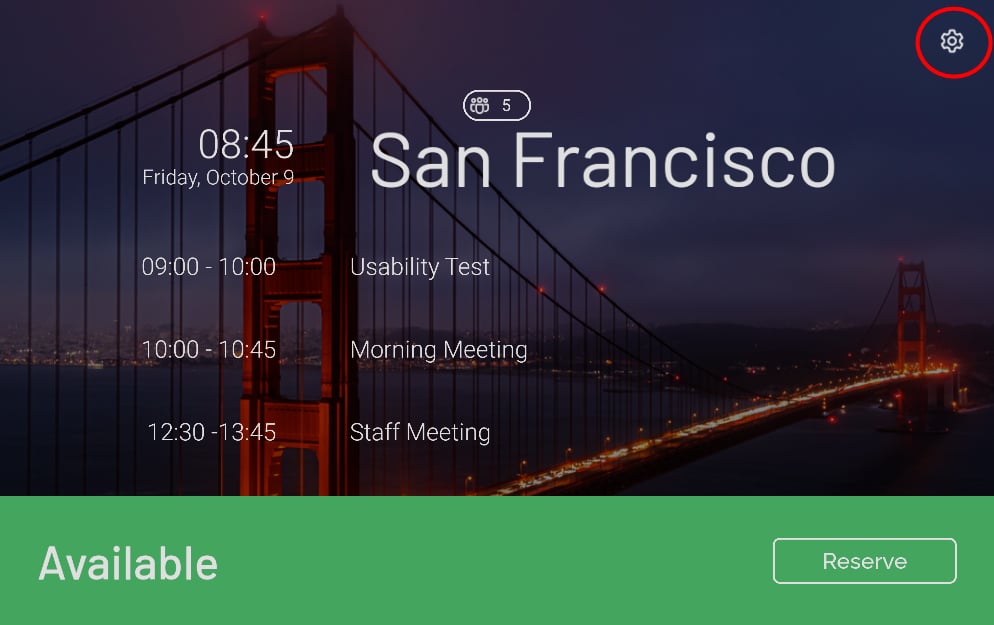
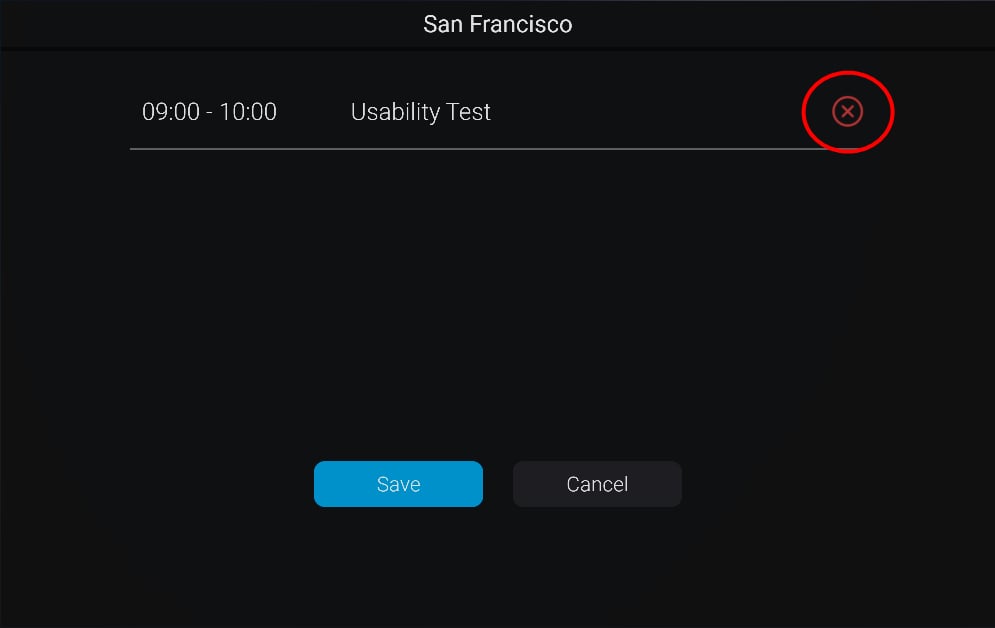
If you want to delete a reservation that you no longer need, press the gear icon in the top-right corner of the screen to open a menu where you can remove reservations.